This is the early access documentation preview for Custom Views. This documentation might not be in sync with our official documentation.
Bloomreach
Bloomreach is a digital experience platform for content management and delivery.
commercetools Frontend comes with an out-of-the-box Bloomreach extension to integrate Bloomreach in your commercetools Frontend project.
On this page, we'll walk you through how to set up the Bloomreach extension.
Prerequisites
- A Bloomreach account
- A Bloomreach Delivery API URL
If the content-bloomreach extension is not available in your commercetools Frontend project at this path packages/PROJECT_NAME/backend, before proceeding with the following configurations, you must:
- Clone the extension repository and add the code to your project.
- Register the extension in your project.
Get started
To start using the Bloomreach extension, follow these steps:
Add the following project configuration field to the project schema from the Studio.
Add Bloomreach project configuration fieldjson{"name": "Bloomreach Extension","fields": [{"label": "Delivery API URL","field": "EXTENSION_BLOOMREACH_DELIVERY_API_URL","type": "encrypted","translatable": false,"required": true}]}Set the Bloomreach configuration value from the Studio.
Deliver content with the Bloomreach extension
To deliver content with the Bloomreach extension, you must first create a Channel and then add Pages to it. Within each page, you can create Documents to display content such as images or text.
For more information on creating content in Bloomreach, visit the following resources:
Upload data source schemas
The commercetools Frontend Bloomreach extension comes with the following out-of-the-box data sources for Bloomreach:
bloomreach/content: to fetch a single content item from Bloomreach.bloomreach/content-list: to fetch multiple content items from Bloomreach with filters and configurations.
To fetch content from Bloomreach, you must upload to the Studio the following data source schemas.
{"customDataSourceType": "bloomreach/content","name": "Bloomreach Content","category": "Content","icon": "source","schema": [{"name": "Content Selection","fields": [{"label": "Channel","field": "channel","type": "text","translatable": false},{"label": "Page","field": "page","type": "text","translatable": false}]}]}
{"customDataSourceType": "bloomreach/content-list","name": "Bloomreach Content List","category": "Content","icon": "source","schema": [{"name": "Content Selection","fields": [{"label": "Channel","field": "channel","type": "text","translatable": false},{"label": "Pages","field": "pages","type": "text","translatable": false}]}]}
Create frontend components
To render on your website the data coming from these data sources, you must create Frontend components, linked to the aforementioned data sources.
Create the Frontend component schemas by uploading the following schemas to the Studio.
Schema for the Bloomreach Content Frontend componentjson{"tasticType": "commercetools/ui/content/bloomreach-blog","name": "commercetools UI Bloomreach Blog","icon": "bookmark","category": "Content","schema": [{"name": "Content","fields": [{"label": "Bloomreach Content","field": "data","type": "dataSource","dataSourceType": "bloomreach/content","required": true}]}]}Schema for the Bloomreach Content List Frontend componentjson{"tasticType": "commercetools/ui/content/bloomreach-blog-list","name": "commercetools UI Bloomreach Blog List","icon": "bookmark","category": "Content","schema": [{"name": "Content","fields": [{"label": "Bloomreach Content","field": "data","type": "dataSource","dataSourceType": "bloomreach/content-list","required": true}]}]}In your commercetools Frontend project, under
components/commercetools-ui/content/blog, add the followingindex.tsxfile for theBlogReact component.index file of the Blog React componentTypeScript Reactconst Blog = ({ title, summary, banner }) => {return (<div className="w-[280px]"><h4 className="py-4 pr-8 text-lg font-bold dark:text-white">{title}</h4><div className="relative h-[160px] w-[280px]"><Imagesrc={banner}objectFit="cover"layout="fill"className="rounded-sm"/></div><p className="box-border pt-4 pr-4 dark:text-white">{summary}</p></div>);};In your commercetools Frontend project, add the
index.tsxfiles for thebloomreach-blogandbloomreach-blog-listFrontend components.Add the following
index.tsxfile undertastics/content/bloomreach-blog.index file of the Bloomreach Blog Frontend componentTypeScript Reactimport React from 'react';import Blog from 'components/commercetools-ui/content/blog';import { BloomreachLoader } from 'frontastic/lib/image';export interface Bloomreach {uid: string;summary: string;title: string;banner: string;}const BloomreachBlogTastic = ({ data }) => {const blog = data?.data?.dataSource as Bloomreach;if (!blog) return <></>;return <Blog {...blog} imageLoader={BloomreachLoader} />;};export default BloomreachBlogTastic;Add the following
index.tsxfile undertastics/content/bloomreach-blog-list.index file of the Bloomreach Blog List Frontend componentTypeScript Reactimport React from 'react';import Blog from 'components/commercetools-ui/content/blog';import { BloomreachLoader } from 'frontastic/lib/image';import { Bloomreach } from '../bloomreach-blog-list';const BloomreachBlogListTastic = ({ data }) => {const blogs = (data?.data?.dataSource ?? []) as Bloomreach[];return (<div className="flex flex-wrap items-center gap-4">{blogs.map((blog) => (<Blog key={blog.uid} {...blog} imageLoader={BloomreachLoader} />))}</div>);};export default BloomreachBlogListTastic;
Register the frontend components in the
tastics/index.tsxfile.Register the Bloomreach Blog and Bloomreach Blog List componentsTypeScript Reactexport const tastics = {...'commercetools/ui/checkout': Checkout,'commercetools/ui/thank-you': ThankYou,'commercetools/ui/cart': Cart,'commercetools/ui/footer': Footer,'commercetools/ui/header': Header,'commercetools/ui/content/bloomreach-blog': BloomreachBlogTastic,'commercetools/ui/content/bloomreach-blog-list': BloomreachBlogListTastic, ...default: NotFound,};
Add data sources and configure data source filters
Now, add the Bloomreach Content and Bloomreach Content List data sources to the page folder where you want to render the content and then configure the data source filters.
To add the data sources to the page folder and configure the data source filters, follow these steps:
If necessary, create a page folder. Otherwise, from the Studio home page or from the left menu, go to Site builder.
In the page folder list, hold the pointer over the page folder where you want to render the content and click the Settings icon: the Page folder settings dialog opens.
In the Data source section, click + Add data source filter: the list of the available data sources opens. From the list, you can select the Bloomreach Content and Bloomreach Content List data sources. When you select a data source, the data source filter editor opens.
Configure the data source filters as follows and save:
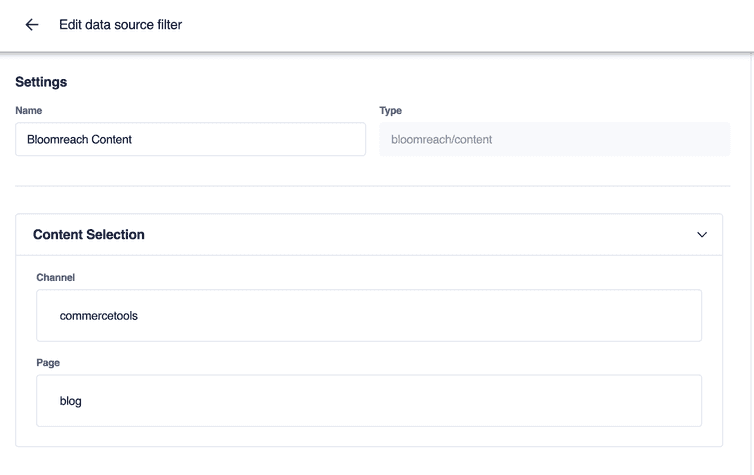
For the Bloomreach Content data source, enter the following:
- In Content Selection, enter the Bloomreach Channel, and the name of the Bloomreach page to display.
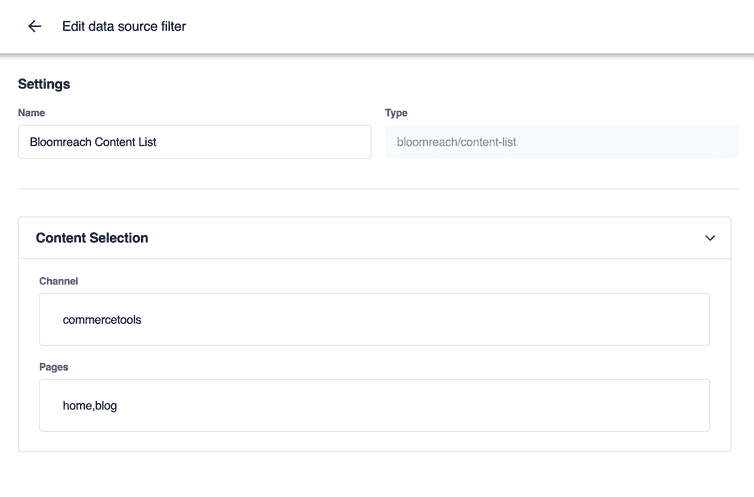
For the Bloomreach Content List data source, enter the following:
- In Content Selection, enter the Bloomreach Channel, and the name of each Bloomreach Page you wish to display, separated by commas.
Add Frontend components to the page version
Finally, you must add the Frontend components you created to the page version where you want to render the content. Thus, the data retrieved from the data source is rendered on the page version through the Frontend component.
To add the Frontend components to the page version, follow these steps:
If necessary, create a page version. Otherwise, from the Studio home page or from the left menu, go to Site builder.
Use the page folder list and the status sections to navigate to the page version where you want to add the Frontend components. Then, hold the pointer over the page version and click the Edit icon: the page builder opens.
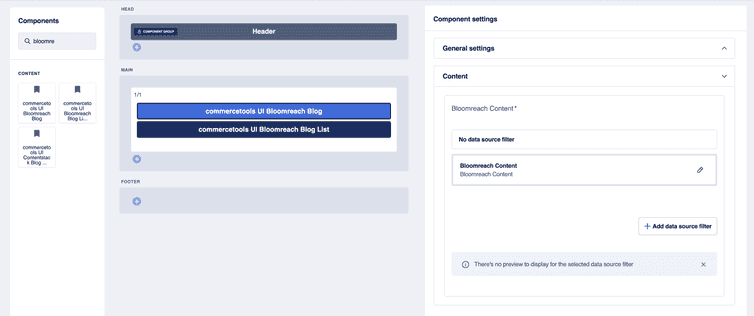
Edit the layout of the page version as you wish. In this example, we add a 1/1 layout element to the MAIN layout section.
Use the Components pane to find the Frontend components to add. Drag the Bloomreach Blog and the Bloomreach Blog List Frontend components to the 1/1 layout element.
Select the Bloomreach Blog Frontend component, then, in Component settings > Content select the Bloomreach Content data source.
Select the Bloomreach Blog List Frontend component, then, in Component settings > Content select the Bloomreach Content List data source.
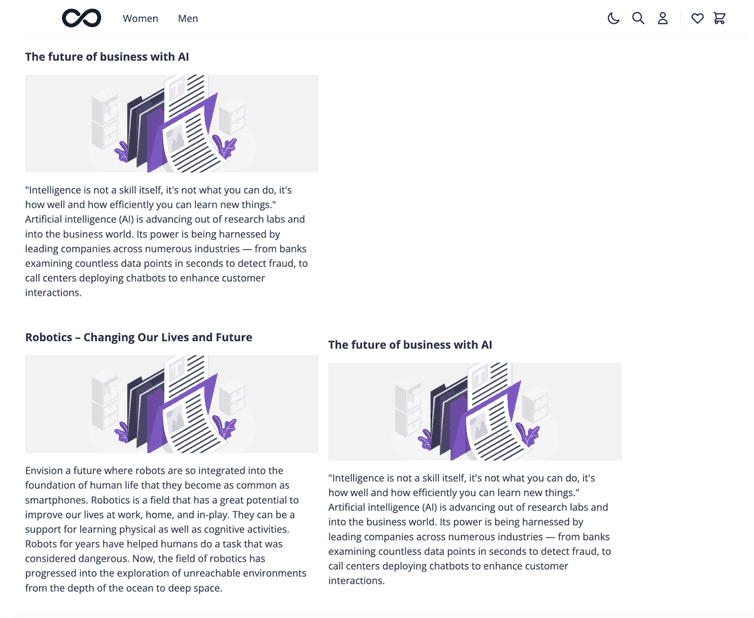
Preview and save your changes. Your Bloomreach page is now rendered on your commercetools Frontend website.


