This is the early access documentation preview for Custom Views. This documentation might not be in sync with our official documentation.
Invoice payment connector
Learn how to add an invoice payment connector to your Project.
The invoice payment connector lets you automate your invoice payment process. By configuring the payment connector and adding invoice as a payment method for your application, invoice will be available as a payment method on your checkout page.
Configure an invoice payment connector
Before you configure an invoice payment connector, create a Composable Commerce API Client with the Orders, Payments, and Types scopes selected.
These permissions are required to establish a communication between Composable Commerce and commercetools Checkout.
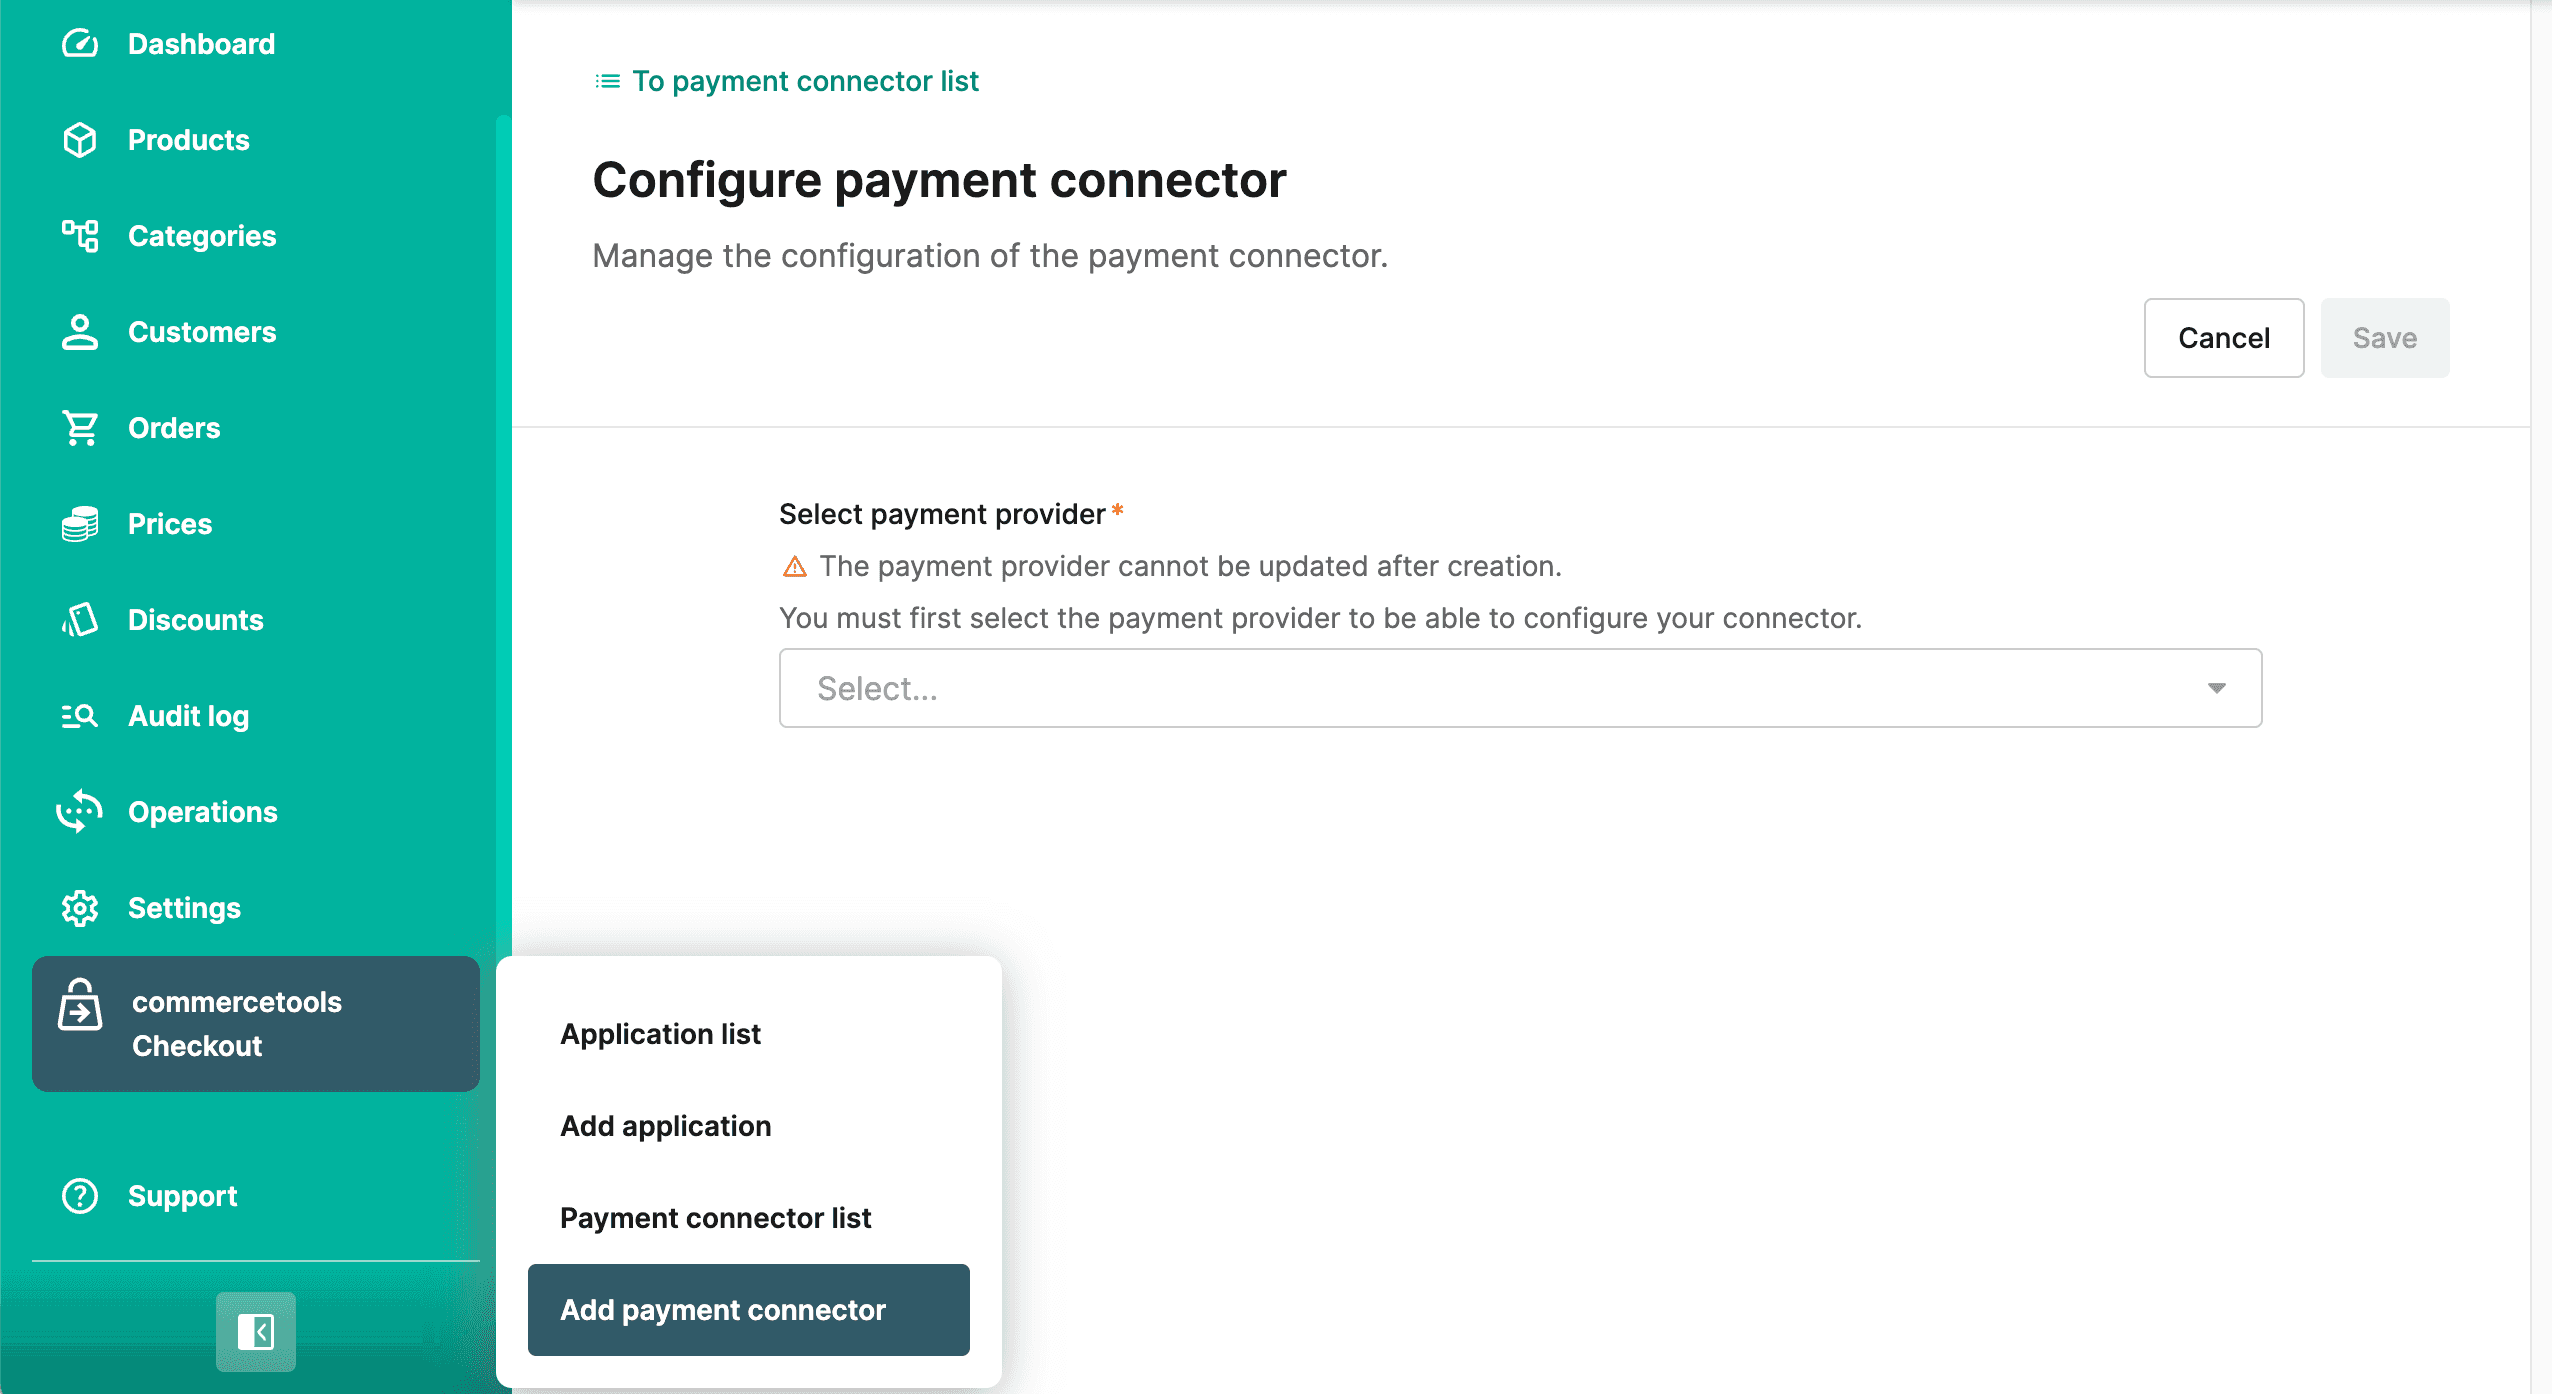
In the Merchant Center navigation menu, select commercetools Checkout > Add payment connector.
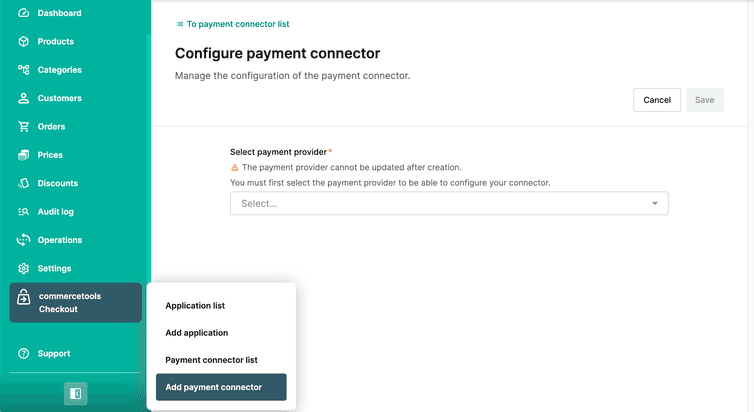
On the Configure payment connector page, do the following:
From Select payment provider, select Invoice.
In the General information section, for Payment connector name, enter a plain-text name for the payment connector.
In the Payment method section, keep the Invoice toggle in the activated position.
In the API client credentials section, do the following:
- For Client ID, enter the client ID you generated while creating the Composable Commerce API Client.
- For Client secret, enter the client secret you generated while creating the Composable Commerce API Client.
Click Save. On saving, a payment connector ID is generated and it will be available in the General Information section.
After adding the invoice payment connector, add the activated payment method for this payment connector to your application.