This is the early access documentation preview for Custom Views. This documentation might not be in sync with our official documentation.
Subscribing to Messages when using Amazon EventBridge
In this tutorial, we are going to demonstrate how to subscribe to Messages and make use of content-based filtering when using Amazon Web Services EventBridge.
Goal
Imagine you want to build functionality that notifies country-specific warehouses for orders so that you can ship closer to the customer's location. In this tutorial, we are going to subscribe to order-related events and use EventBridge to route OrderCreated messages to country-specific SQS queues.
Prerequisites
For this tutorial, you need credentials for an API Client. If you don't have an API Client yet, please create one with scope
Manage Subscriptionsas described in the documentation.Additionally, you need an AWS account Identifier and the region in which you want to receive the messages.
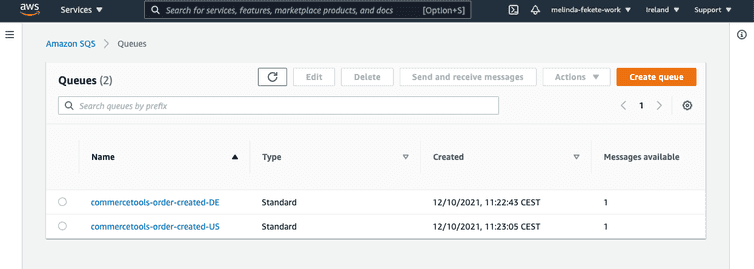
Lastly, you will need AWS target resources to forward events to. EventBridge supports a wide variety of target types, you can find the full list here. In this tutorial, we’ll be using AWS SQS as a target resource. Here is an additional link that helps you get started with SQS: Getting Started with Amazon SQS. For this example, we have created two SQS queues: one for orders placed in Germany and one for orders in the US.
Configure an event source by setting up a Subscription
To configure an event source for EventBridge, you first need to create a Subscription via the Subscription API, with the following example payload:
{"key": "eventbridge-tutorial","destination": {"type": "EventBridge","accountId": "<my-account-id>","region": "<my-region>"},"messages": [{"resourceTypeId": "order","types": []}]}
Once this is successful, the response will look similar to this:
{"changes": [],"createdAt": "<timestamp>","destination": {"accountId": "<my-account-id>","region": "<my-region>","source": "aws.partner/commercetools.com/commercetools-project-1/eventbridge","type": "EventBridge"},"id": "<subscription-id>","lastModifiedAt": "<timestamp>","messages": [{"resourceTypeId": "order","types": []}],"version": 1}
As a result, a new event source is created automatically in the AWS account and region specified. If you require further help setting up the Subscription itself, please visit this tutorial.
Associate the commercetools event source with an event bus
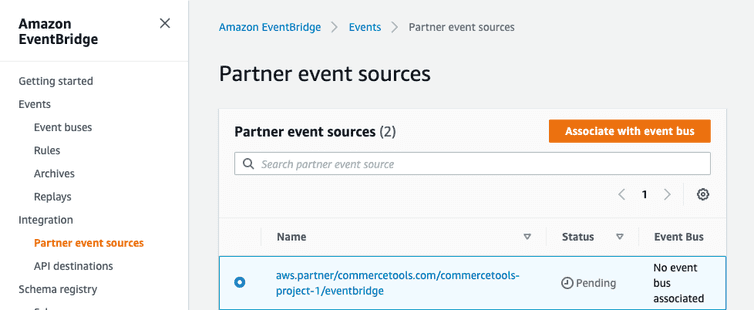
Log in to the AWS console and select Amazon EventBridge from the list of available services. Then navigate to Integration > Partner event sources from the left-hand menu. Here, you can see that a new partner event source is automatically created with your project-key indicated in the name. Make sure to select the correct region in the region drop-down, as it needs to match the one specified in your Subscription for the event bus to connect with the event source. Once you selected the suitable event source, click Associate with event bus.
Set up forwarding rules
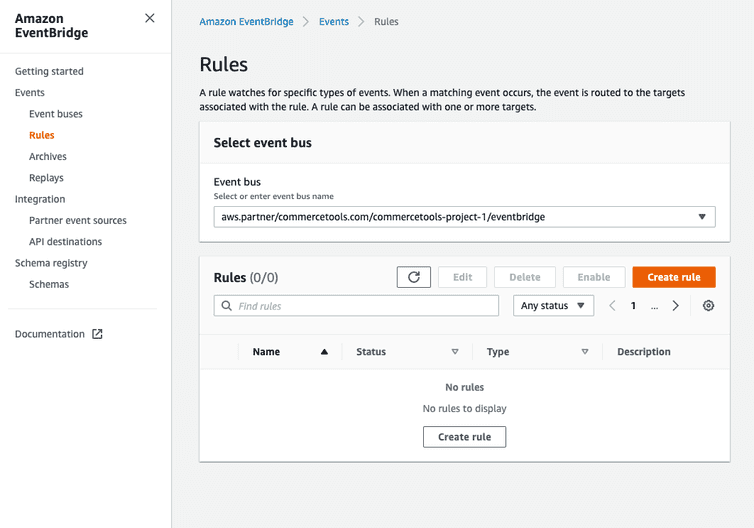
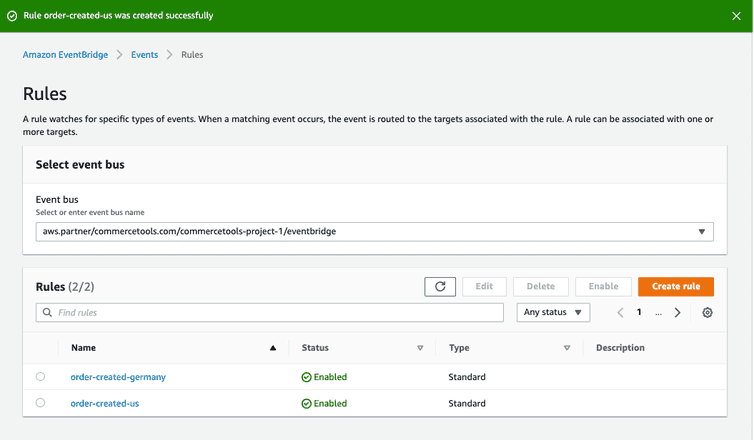
To ensure that messages reach the desired destinations, you will have to specify some forwarding rules. These rules match incoming events and forward them to your targets of choice for further processing. To set up rules, navigate to Events > Rules in the menu and select the event bus you associated in the previous step. In this example, we will create two rules that match messages of type OrderCreated and forward them to separate SQS queues based on what country is specified in the shipping address.
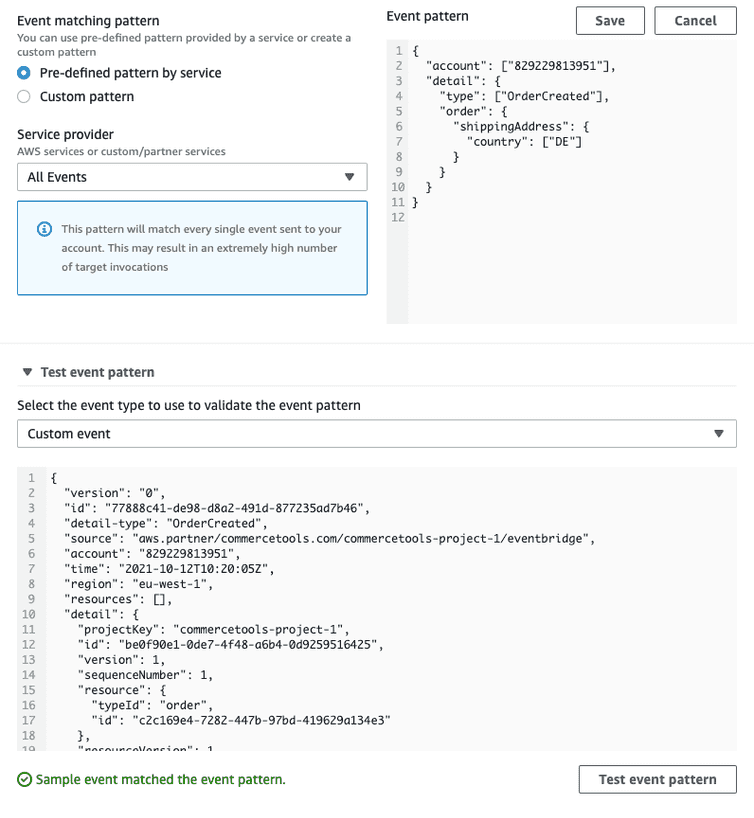
Upon clicking Create rule, you are provided with an editor where you are able to specify a name for the rule and define what patterns EventBridge should match on for its filtering and forwarding actions. The editor also lets you test your pattern with example events. To forward messages based on the content of the message, select the Pre-defined pattern by service option. You can either choose to match All events or only match events from commercetools Composable Commerce by selecting commercetools from the Service provider list.
When you define a new pattern, you may want to look at some example messages to help you test that your rules match the events as expected. One possible way to do this is to create a forwarding rule to forward messages to a CloudWatch log group or an SQS queue and retrieve example messages from there once you know a corresponding event happened in commercetools Composable Commerce. With an example message at hand, you are able to test if your specific pattern would match the event. A shortened version of an OrderCreated message looks like this:
{"version": "0","id": "2d63b273-6a8f-a23b-0dd2-7c6dd6bdcbfe","detail-type": "OrderCreated","source": "aws.partner/commercetools.com/commercetools-project-1/eventbridge","account": "829229813951","time": "2021-10-19T08:40:45Z","region": "eu-west-1","resources": [],"detail": {"notificationType": "Message","projectKey": "commercetools-project-1","id": "d4d929cc-16c9-4757-bfcc-a887b99bf6bf","version": 1,"sequenceNumber": 1,"resource": {"typeId": "order","id": "2bc22ce7-4c9f-4a84-a826-c5d1f873956f"},"resourceVersion": 1,"resourceUserProvidedIdentifiers": {},"type": "OrderCreated","order": {"type": "Order","id": "2bc22ce7-4c9f-4a84-a826-c5d1f873956f","shippingAddress": {"country": "DE"}}}}
Using the following snippet in the Event pattern editor, we match for events of type OrderCreated where the shipping address is in Germany:
{"account": ["829229813951"],"detail": {"type": ["OrderCreated"],"order": {"shippingAddress": {"country": ["DE"]}}}}
Configure targets to forward messages to
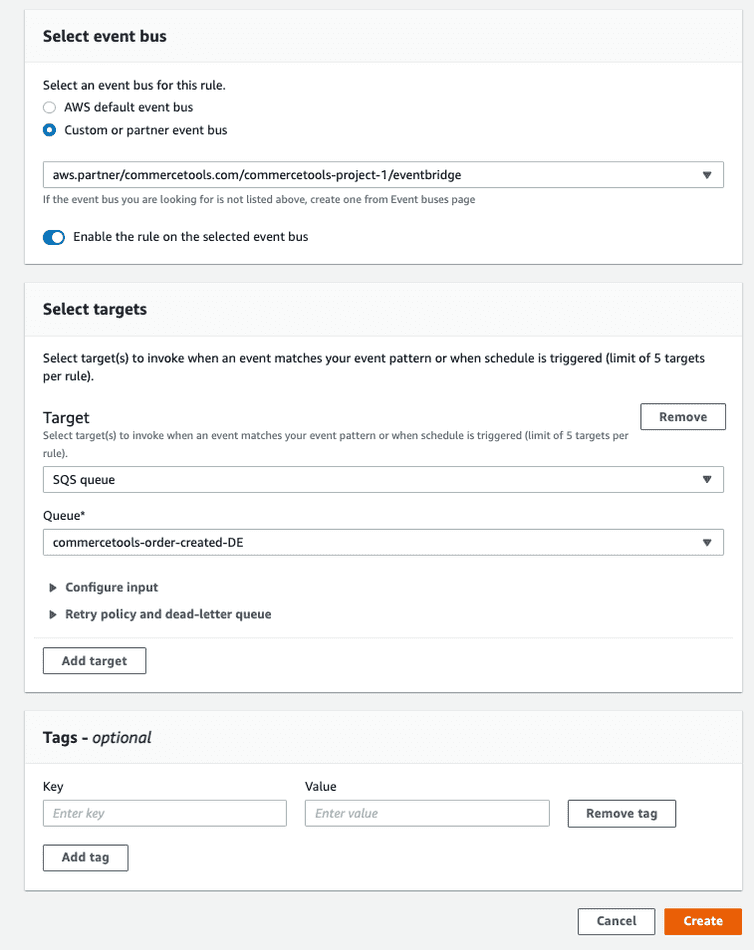
After you define the pattern to match on, you can specify the event bus that the rule should apply to and the target where the message should be forwarded to. In this example, we are forwarding messages to an SQS queue called commercetools-order-created-DE when an order is created with a German shipping address.
You can continue to add additional rules that forward messages based on different criteria. We have created an additional rule to forward OrderCreated messages with a US shipping address to our commercetools-order-created-US queue.
Test your forwarding rules
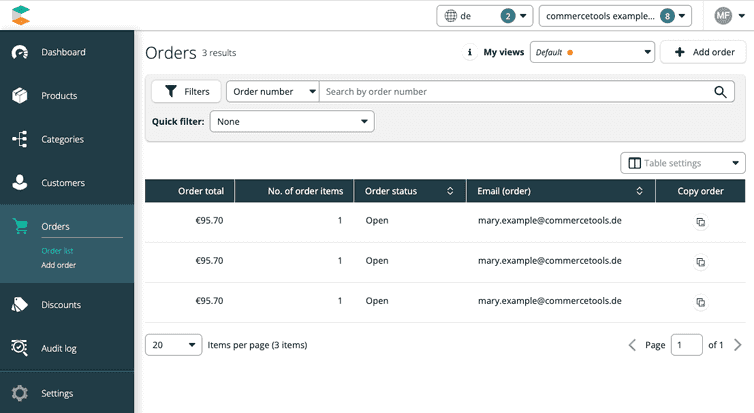
To test that the forwarding rules are working as expected, create some test resources that match the event pattern you specified. For this example, we use the Merchant Center to create three test orders for different countries, one with a US, one with a German, and one with a UK shipping address.
By looking at the contents of our SQS queues and inspecting the messages, we are now able to verify that the correct messages have been delivered to the correct queues.
With these rules in place, our event bus receives messages every time an Order is created, but not when they are updated, or deleted. EventBridge will forward all messages of type OrderCreated with a shipping address in the US or to our commercetools-order-created-US queue and orders for Germany to our commercetools-order-created-DE queue. This architecture allows us to react to these events differently, for example notify the respective warehouses of a new order.
Further Learning
Check out tutorials by AWS for further tips and tutorials on working with EventBridge.
