This is the early access documentation preview for Custom Views. This documentation might not be in sync with our official documentation.
Get started with the TypeScript SDK
Learn how to set up and use the TypeScript SDK.
This step-by-step guide leads you through setting up and making API calls using the TypeScript SDK.
Requirements
To follow this guide you should have the following:
- A commercetools Composable Commerce Project
- An API Client
- Node v12.22.7 (or later)
- Either npm v6 (or later) or yarn v1.22.17 (or later)
For more information on setting up a commercetools Composable Commerce Project or API Client, follow our Getting started with commercetools Composable Commerce guides.
Objectives of the get started guide
By the end of this guide you will have:
Placeholder values
Example code in this guide uses placeholders that should be replaced with the following values.
If you do not have an API Client, follow our Get your API Client guide.
| Placeholder | Replace with | From |
|---|---|---|
{projectKey} | project_key | your API Client |
{clientID} | client_id | your API Client |
{clientSecret} | secret | your API Client |
{scope} | scope | your API Client |
{region} | your Region | Hosts |
Install the TypeScript SDK
Use the following commands to install SDK components from npm or Yarn.
| SDK | npm | Yarn |
|---|---|---|
| SDK Client | npm install @commercetools/sdk-client-v2 | yarn add @commercetools/sdk-client-v2 |
| HTTP API | npm install @commercetools/platform-sdk | yarn add @commercetools/platform-sdk |
| Import API | npm install @commercetools/importapi-sdk | yarn add @commercetools/importapi-sdk |
| Audit Log API | npm install @commercetools/history-sdk | yarn add @commercetools/history-sdk |
The SDK Client and the HTTP API must be installed. The Import API and Audit Log API are only needed for more specific use cases.
Create a ClientBuilder file
Create a new file called BuildClient.ts and insert the following code.
This code creates a Client that is used to make API calls.
import fetch from 'node-fetch';import {ClientBuilder,// Import middlewarestype AuthMiddlewareOptions, // Required for authtype HttpMiddlewareOptions, // Required for sending HTTP requests} from '@commercetools/sdk-client-v2';const projectKey = '{projectKey}';const scopes = ['{scope}'];// Configure authMiddlewareOptionsconst authMiddlewareOptions: AuthMiddlewareOptions = {host: 'https://auth.{region}.commercetools.com',projectKey: projectKey,credentials: {clientId: '{clientID}',clientSecret: '{clientSecret}',},scopes,fetch,};// Configure httpMiddlewareOptionsconst httpMiddlewareOptions: HttpMiddlewareOptions = {host: 'https://api.{region}.commercetools.com',fetch,};// Export the ClientBuilderexport const ctpClient = new ClientBuilder().withProjectKey(projectKey) // .withProjectKey() is not required if the projectKey is included in authMiddlewareOptions.withClientCredentialsFlow(authMiddlewareOptions).withHttpMiddleware(httpMiddlewareOptions).withLoggerMiddleware() // Include middleware for logging.build();
Adding middleware
This example code configures authMiddlewareOptions and httpMiddlewareOptions to handle auth and HTTP requests respectively.
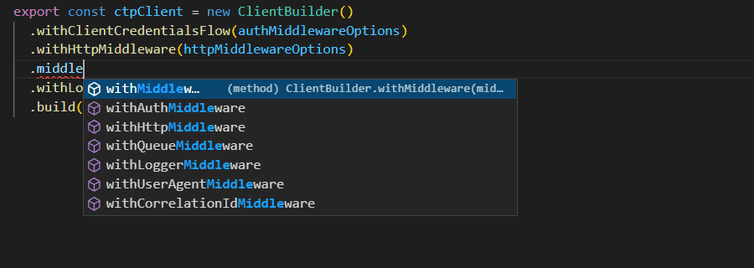
You can configure and use other middleware based on your requirements and add them to ctpClient with method chaining.
You can learn more about configuring and using middleware on the Middleware page.
Create the Client
Create a new file and include the following code:
import { ctpClient } from './BuildClient';import {ApiRoot,createApiBuilderFromCtpClient,} from '@commercetools/platform-sdk';// Create apiRoot from the imported ClientBuilder and include your Project keyconst apiRoot = createApiBuilderFromCtpClient(ctpClient).withProjectKey({ projectKey: '{projectKey}' });// Example call to return Project information// This code has the same effect as sending a GET request to the commercetools Composable Commerce API without any endpoints.const getProject = () => {return apiRoot.get().execute();};// Retrieve Project information and output the result to the loggetProject().then(console.log).catch(console.error);
apiRoot can now be used to build requests to the Composable Commerce API.
This code includes getProject() as an example. If you run this code, the Project is returned.
How to structure your API call
Add an endpoint
An endpoint should be added to apiRoot. The following targets the Shopping List endpoint:
apiRoot.shoppingLists();
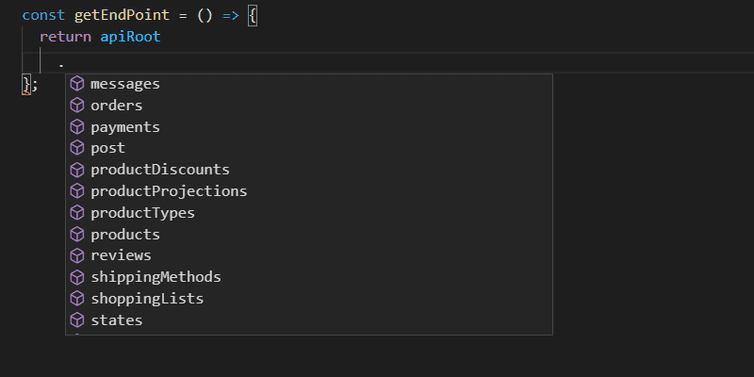
If your IDE supports auto-complete, the full list of endpoints can be viewed.
If no endpoint is specified, the Project is referenced.
Query a specific entity using withID() or withKey()
To query a specific entity (such as an individual Shopping List), include its id or key using .withId() or .withKey() respectively.
apiRoot.shoppingLists().withId({ ID: 'a-shoppinglist-id' });
apiRoot.shoppingLists().withKey({ key: 'a-shoppinglist-key' });
Add the method
After selecting the endpoint, select a method to use. get() is used to query entities. post() is used to create and update entities. .delete() is used to delete entities.
apiRoot.shoppingLists().withId({ ID: 'a-shoppinglist-id' }).get();
Adding parameters and payloads
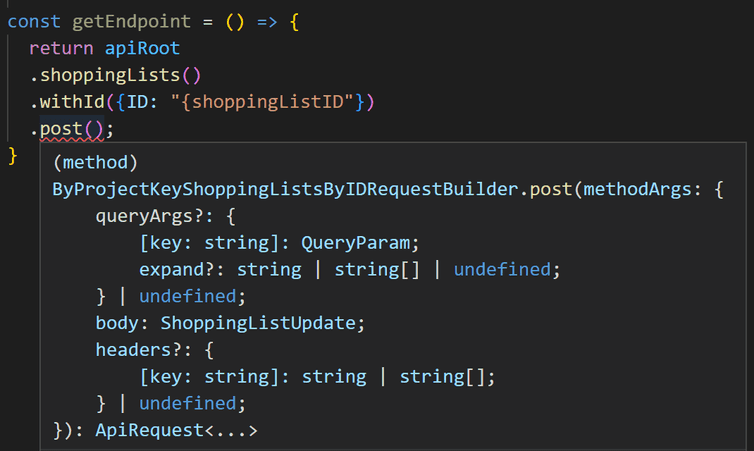
Parameters for querying entities can be included within get(). Parameters and payloads for updating and creating entities should be included within post().
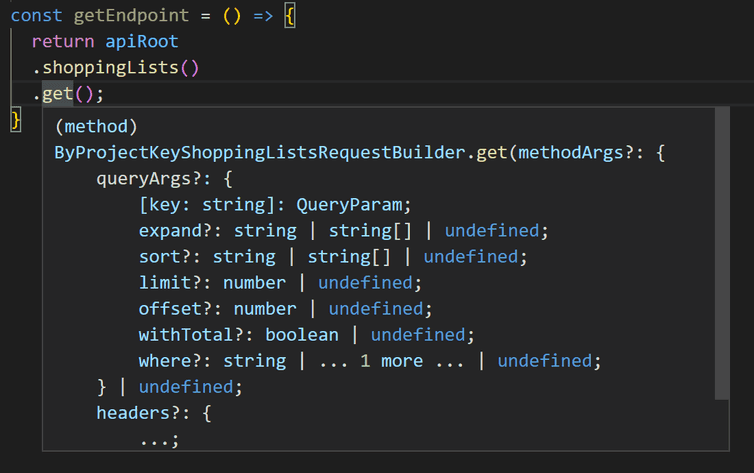
When getting the Shopping List endpoint, optional parameters can be included to modify what Shopping Lists are returned:
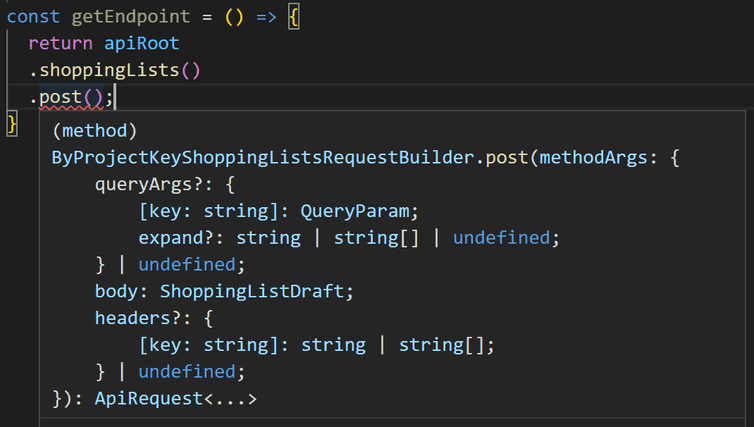
When posting to the Shopping List endpoint, a body payload must be included. This payload (ShoppingListDraft) creates a new Shopping List:
When posting to a specific Shopping List, a body payload must be included. This payload (ShoppingListUpdate) updates the specified Shopping List:
.execute() .then() .catch()
.execute() sends the API request.
.then() adds functionality that should follow the API request. In the following example code, then() is used to output the response to the console.
.catch() should be included for assisting with debugging and error handling.
apiRoot.shoppingLists().withId({ ID: 'a-shoppinglist-id' }).get().execute().then(({ body }) => {console.log(JSON.stringify(body));}).catch(console.error);
Using the TypeScript SDK in the browser
The TypeScript SDK can also be used in a web browser.
Create an HTML file and insert the following code:
<!DOCTYPE html><html lang="en"><head><title>TypeScript SDK Examples</title><script src="https://unpkg.com/@commercetools/sdk-client-v2@0.2.0/dist/commercetools-sdk-client-v2.umd.js"></script><script src="https://unpkg.com/@commercetools/platform-sdk@1.20.0/dist/commercetools-platform-sdk.umd.js"></script></head><body><!-- Click this button to return the Project details --><p><button onclick="getProjectDetails()">Get Project Information</button></p><!-- This text is overwritten when getProjectDetails() finishes --><p id="details">Click the above button to display the Project information.</p></body><script>// Enter your API client configurationvar oauthUri = 'https://auth.{region}.commercetools.com';var baseUri = 'https://api.{region}.commercetools.com';var credentials = {clientId: '{clientID}',clientSecret: '{clientSecret}',};var projectKey = '{projectKey}';// Builds the clientvar { ClientBuilder } = window['@commercetools/sdk-client-v2'];var client = new ClientBuilder().defaultClient(baseUri, credentials, oauthUri, projectKey).build();var { createApiBuilderFromCtpClient } =window['@commercetools/platform-sdk'];var apiRoot = createApiBuilderFromCtpClient(client).withProjectKey({projectKey,});// Returns the Project detailsfunction getProjectDetails() {apiRoot.get().execute().then(function ({ body }) {window.document.getElementById('details').innerHTML =JSON.stringify(body);});}</script></html>
When loaded in your web browser this page displays a button that, when clicked, returns your Project information.
The getProjectDetails() function is similar to code examples within this get started guide. Consult the previous code examples to add further functionality to the HTML document.
Next steps
Try our example code
Continue learning about the TypeScript SDK by checking our SDK code examples. You will find example code for creating, querying, and updating Customers and Products.
Set up a demo application
The Me Endpoint Checkout app demonstrates how to use the Me endpoints to create an example web store.
